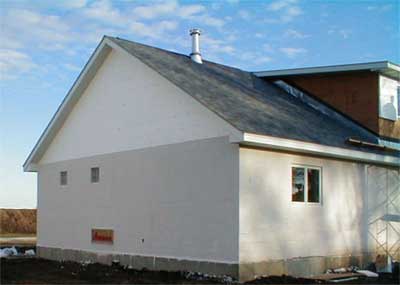
Bungalows
Bungalows are known for their small size, efficient use of space and attention to detail. The traditional bungalow has a one-story appearance with a large, relaxing porch. Often a second story is tucked under the roof with the help of dormers. There are many sub-categories of bungalows (Chicago, California, Prairie, Arts and Craft, etc). After 100 plus years of refinement, they are still popular because of their diversity and affordability.
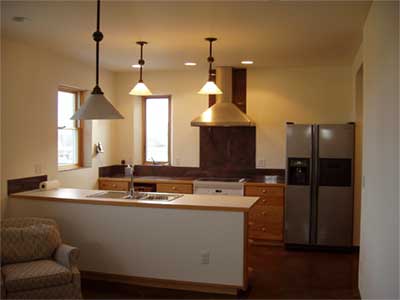
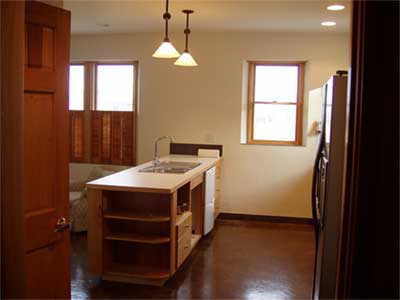
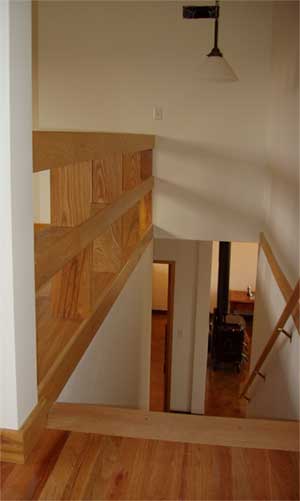
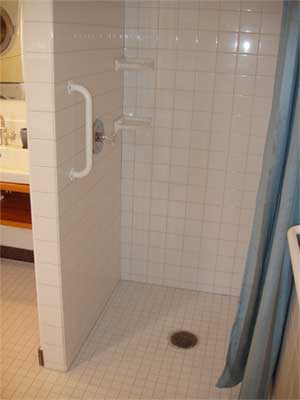
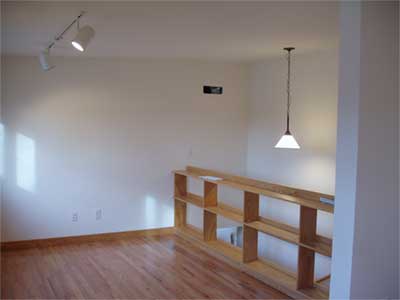
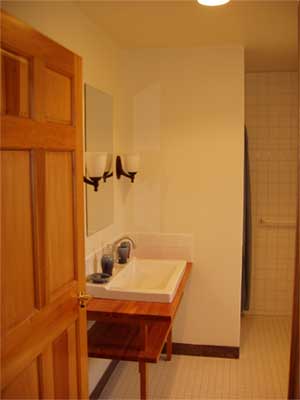
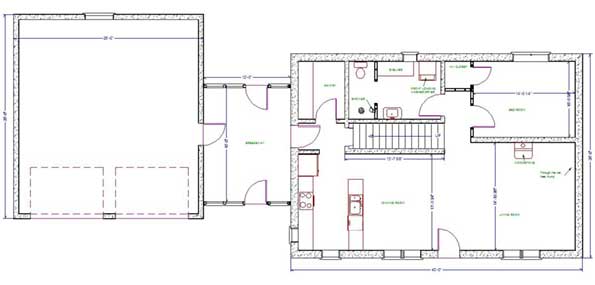
From our experience the ideal dimensions of a bungalow are 28x40 feet. On the first floor the front half of the house is an open public space flowing from the living room to the dinning area and kitchen. Directly off the kitchen is a large walk-in pantry with additional counter space. The master bedroom with a walk-in closet is behind the living room and adjacent to a full bath and laundry. The bathroom floor is lowered to accommodate a thin electric underfloor heating mat under the floor tile, and to provide complete drainage to the shower floor drain. The central straight stairway helps separate the bathroom from the rest of the living area. The stair to the basement lines up directly with the door to the breezeway and garage, just off the kitchen.

Basement
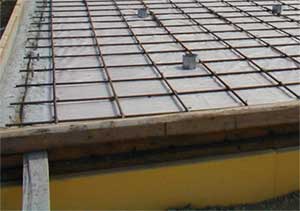
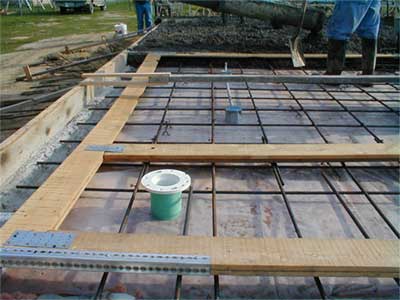
The basement walls are directly under the first floor walls to support the six-inch thick reinforced poured-in-place concrete floor. The underside of the first floor is the ceiling of the basement. We plaster the ceiling with TEC 393 thinset mortar because of its durable white finish. The more attention paid to the concrete forms used during pouring, the smoother the walls will be. In some cases, one may use a diamond masonry grinder, or a Bulldog impact hammerdrill to smooth ridges and rough edges.
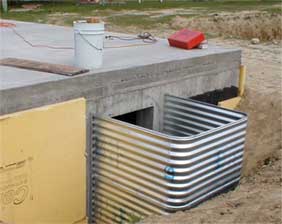
Conduit for all electrical outlets and switches are placed in the walls and ceiling before pouring concrete so that wiring can be upgraded at anytime in the future. Telephone, TV and Internet cables are run in separate conduit to avoid signal interference. The bathroom in the basement includes both a shower and Jacuzzi tub. The basement can be left open like the first floor, or divided into several bedrooms, den, family room, workshop, etc. Large egress window wells are installed in all potential bedroom spaces. All vinyl windows are recommended in the basement.
Under the basement floor, we place two-inches of extruded polystyrene insulation (XPS), then eight to ten inches of sand in which electrical resistance heating cables or PEX flexible tubing for hot water heating are placed. The sand is covered with plastic sheeting and finally three to four inches of concrete. The advantage of electrical heating cables is simplicity and space savings, i.e. no hot water tank is needed.
[how likely?] However, if the heating cables ever burnout you will have to remove the basement floor to replace them. The PEX tubing with a small water heater, circulation pump, and control valves (manifold) is a little more complicated, but all parts that can break are accessible without removing the floor. Both systems can be used to store energy during cheaper off-peak times of the day and then slowly radiate the heat over the rest of the day. The basement exterior is waterproofed with a compound compatible with XPS and then wrapped in two inches of XPS from the top of the basement wall down to the footings. Insulating on the exterior of the basement walls and under the basement floor allows us to use the walls, floor and ceiling as thermal mass, i.e. heat storage. (See Thermal Mass in the concepts section for more information.) This also creates a more uniform temperature in the room as the heat slowly rises. For comparison, hold your hand near the ceiling and then the floor in a conventional house during the winter and you’ll notice it is warmer near the ceiling.
Finishing concrete floors
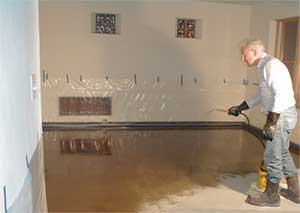 The concrete floors are acid stained and sealed giving them a luxurious stone color. (See Concrete Stain and Sealers) The floors are easy to sweep, mop or vacuum. One can even bring in a garden house and wash the floors because the water will drain to the bathroom floor drains. Just remember floors are slippery when wet! Because of the strength of the concrete floors, you can later tile them or install wood flooring, cork or carpet. However, area rugs provide a nice accent and are much easier to care for.
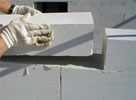
Building AAC walls
An experienced team of five block layers can install on average 1,000 square feet of AAC wall per day. For a typical 28x40 foot building, this means the walls for each floor can be erected in less than two days. An additional employee would be responsible for installing conduit for electrical outlets, phone lines, cable and internet. An inexperienced team can lay block at about half the rate of an experienced team. (See the How To section for step by step instructions.)
Exterior façade options
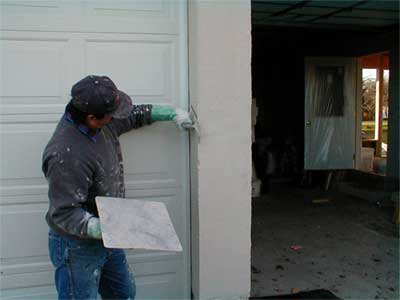
Stuccoing the exterior and plastering the interior AAC walls with cement-based products is the simplest and most affordable approach to finishing the walls. Stucco can be dyed any color and does not need painting. If you ever decide to paint, it is very important to use a paint that will allow moisture to pass through. These types of paint are called vapor permeable. Stucco will easily last 50 years without any maintenance. Brick is a second excellent exterior option. The only drawback is the additional cost. Wood, vinyl or aluminum siding can be installed on furring strips over AAC walls, however it is more expense to care for over the life of the building.
Adding a second story
If you decide to create a second story space there are several choices that can greatly impact the cost of the house. First, if you use wood framed walls in the second story you will need many additional different types of materials. Second, dormers can add valuable headroom, architectural appeal, and cost. Third, the first square foot of a second story is the most expensive. In a 2,500 square foot bungalow, we estimate adding a single room in the second story adds a minimum of $14,000 to the total construction cost in materials and labor.
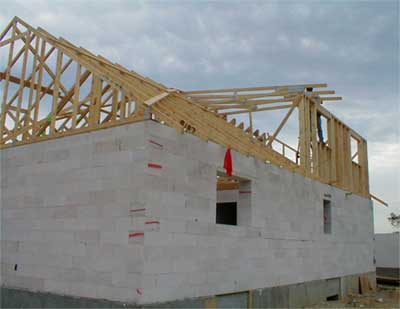
Roof structure options
The least expensive roof is built with 4-12 pitch wood trusses and light colored asphalt shingles. The pitch describes the slope of the roof in terms of rise over run. The roof is four feet higher, twelve feet closer to the peak. A 4-12 pitch roof provides adequate drainage with a minimum roof area, thus why it is the least expensive. The steeper a roof is, the more quickly rain and snow will slide off. If a shingled roof isn’t steep enough water can actually flow uphill due to surface tension and cause leaks. In this bungalow the second story dormer roof is covered with a single rubber membrane because the pitch is 2-12. For comparison the main roof has an 8-12 pitch.
The following diagrams highlight a few second story options in generally increasing complexity and cost. First, there is the simple wood truss without a second story. Second, the room-in-attic truss has an open center area, which can be finished for living space. Third, a scissors truss creates a vaulted ceiling. The amount of usable second story floor space depends on the width of the building, the pitch of the roof and the height of the stub wall on which the scissors trusses rest. Adding a three to five foot high stub wall can significantly increase the useable space. Fourth, a combination of trusses and framing to create dormers can add space and architectural style. More information about wood trusses is available at http://www.alpeng.com/wood_truss_info.html .
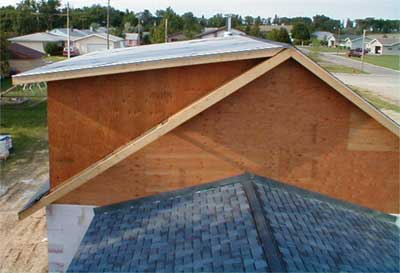
Finishing gable and dormer walls
The red line in the photo shows the bottom of the second story gable wall. On this house the gable wall is sheathed (covered) with OSB (a type of plywood), tarpaper, bead board Styrofoam insulation, fiberglass mesh and elastomeric acrylic stucco used in EIFS applications (Exterior Insulation and Finish Systems). Over time coloration differences between the cement stucco on the AAC and the acrylic stucco on the gable wall may occur as the different materials weather differently. It should also be noted that EIFS have problems with moisture and mold if not adequately ventilated.
One option to prevent the risk of coloration differences is to cover the sheathing with waterproofing, metal lath and the same cement stucco used on the AAC. This is how wood houses were stuccoed in the past. There are still cracking risks because the wood substructure will expand and contract over the year as the humidity and temperature change.
For simplicity, we recommend using traditional siding on wood framed gable and dormer walls with a drip edge at the bottom where it meets the AAC. The drip edge should extend beyond the AAC so that water does not run down the AAC. Otherwise the stucco may be stained from dirt and chemical washed down from the wood siding.
An even better solution is to use AAC block for the end gable walls so that you have a continuous single material wall from top to bottom. It will require more scaffolding and block cutting, but in the long run it will prevent numerous maintenance headaches.
(Side cutaway of the bungalow wall. Rotate the bungalow floor plan 90 degrees to fit on a single page.)

Concrete floor options
In this house, as described above, a six-inch thick reinforced concrete slab was poured above the basement. The advantages of this approach are: the total floor and ceiling system is only six-inches thick and the underside of the floor is the ceiling of the basement.
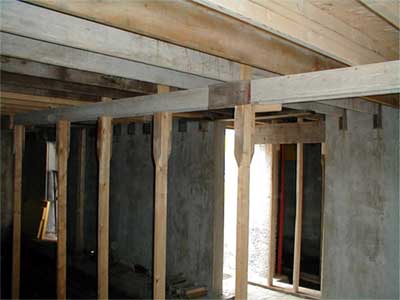
A second option is to use steel, open web trusses and a thinner concrete floor, approximately three inches thick. Some system use steel sheets called “pans” to hold the concrete while it cures. Other systems use temporary plywood sheets to support the concrete while it hardens, after which the plywood is removed. The advantages of these composite steel truss and concrete floor system are: they are faster to install, they require less bracing and temporary supports while the concrete is curing, they weigh less, and they have open spaces underneath to run pipes, wires and ducts. The main disadvantage is they are thicker because of the combined truss, concrete slab and sheetrock ceiling.
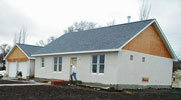
Finished House